** COMPRESSOR INCLUDED **
Excellent "Like New" Condition*
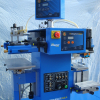
Combination Automatic Screen Printing & Pad Machine
PRINT ON ROUND OR FLAT, SMOOTH OR ROUGH, SOFT OR HARD
Cups, Pens, Mugs, Sports Bottles, Golf Balls, Frisbees, Ribbons, Stress Balls, etc..
THREE MACHINES IN ONE:
The PrintAll system is a combination automatic color pad and screen printing system, developed with the user in mind. Fast, precise and extremely easy to operate. Pad printing, rotary and flat screen printing at up to 1200 pieces per hour in one compact machine. The PrintAll's simple multi-color registration system allows operators the easiest and most cost efficient method for decorating products with a formula that is tried and proven with thousands of operators worldwide. The PrintAll is not just a unique printing machine, it is the complete decorating system!
PAD PRINTING:
Unusual shapes are easily decorated with incredibly fine detail and ease with the sealed inkwell system: plastics, glass, ceramics, wood, fabrics, metals and alike. When a marking need to stand out and detail must be placed on odd shaped surfaces like golf balls or operating dials. The PrintAll pad print section delivers complete flexibility and speed.
SPECIFICATIONS: Speed - max: 1700 pieces per hour, Plate size - 100 x 130mm (4 x 5 1/4 inches), Electro pneumatic drive system, Magnetic teflon coated inkwell, Quick release doctoring system, Expandable with 2 color option (not included)
FLAT / ROTARY SCREEN PRINTING SYSTEM:
Large print areas and round objects are completely covered with the Printall screenprint section. Whether a coffee mug, or a sports bottle auto inflation ensures that surfaces are rigid for decorating with our built in multi-color registration device.
With an under 2 minute conversion from flat setups to round printing up to 360°. SPECIFICATIONS: Speed - 1000 cycles per hour, Printing diameter 140mm (51/2 inches), Soft start energiser valves, Optional Vacuum Table to hold flat objects, Pneumatic inflation system for soft sided objects (Rotary) ,Screen size 470 x 770mm (181/2 x 10 5/8 inches)
THE PRINTALL OPTIONS:
• Hotfoil Stamping Conversion Kit • Multi-Color Pad Conversion Kit • Vaccuum Jigs and Beds
PACKAGE INCLUDES:
• Air Compressor • Rotary Printing Attachment (with mug mandrel and inflation tip for soft sided objects) • Exposure Unit with Vacuum Table for Burning Screens and Plates. • 1 Mug Screen • 2 Standard Screens • Multiple Pads in Various Shapes/Sizes • Pad Life • Plates • Capillary Film • Extra Ceramic Ring for Magnetic Inkwell ($250 value) • User Manual
REGARDING SHIPPING: The machine weighs 230 lbs will fit on a single skid. HOWEVER, I would recommend giving Specialized Transport a call for a quote. They are what used to be North American VanLines and ship the machine standing up on all four legs (wrapped it in blankets and bubble wrap of course) - that way the machine doesn't need to be broken down and shipped strapped to a pallet. Their website is http://www.stidelivers.com/
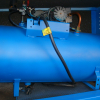
*This machine is in beautiful condition, however, it is a used piece of industrial equipment and does have signs of wear. Also, the plastic handle to open the compressor compartment is cracked and non-functional and will need to be replaced or repaired.
ebayAuction Link


There are 6 Comments
Re: Automatic Screen Printing & Pad Combo (COMPRESSOR incl): the
I will post the answer tomorrow...
Re: Automatic Screen Printing & Pad Combo (COMPRESSOR incl): the
This particular machine was used to print logos/graphics on corporate branded items.
EQUIPMENT:
Exposure Unit w/Vaccum
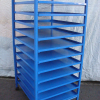
Drying Rack
SUPPLIES:
Extra NEW Ceramic Ring for Magnetic Inkwell ($250 value)
Instruction Manual
New Pad Plates (~5 are included)
Silicone Pads (6 different pads in various shapes and sizes)
Aluminum Screens (2 Flat and 1 Rotary)
Exposure Calculator
Capillary Film (two partial tubes)
Screen Foam Pads (for Capillary film application)
Squeegees (enough material for 6 new squeegees)
Bottle of "Pad Life" (pad preservant)
Tool Box w/miscellaneous tools
FIXTURES:
Rotary Screen:
Self Adjusting Mandrel; Hard Substrates (ceramic, glass, metal);fits 2"-3.75" ID
Pneumatic Inflation Tip; Soft Substrates (plastic) - (6 conical tips; .5"-3.5" ID)
Bottom Fixture - Hard & Soft (universal; 1 included - fits .5"-4" OD)
Flat Screen:
Platen (universal; 1 included)
Pad Printing:
Substrate Fixtures (~20 shop built molds)
TO PRINT:
Pad Printing: This is a process used to transfer a detailed 2D image onto a 3D object. Examples: Branded Items (logos/graphics) Golf Balls, Pens, Watches, etc), Medical devices (surgical instruments, contact lenses, etc.), Automotive parts (turn signal indicators, speedometers, etc.), Letters on computer keyboards and calculator keys, Identification labels and serial numbers, etc. To begin any pad printing job, a "jig" (or industry termed "fixture") must first be obtained by fabrication in house or bought commercially (We always made them in house). I have a collection of these DIY fixtures that I can include if you like (~20). My DIY method for making a fixture for this system is by first constructing a flat bottomed container made out of cardboard and tape (padded ~30% larger than the substrate), filling it with a 2 part epoxy putty (bondo), allowing it to semi-harden and then submerging the bottom half of one of the items to be printed ("substrate"), image side face up, flat and level into the putty. Once it dries, the sample substrate is removed leaving a mould of the bottom half of the item. You now have a completed fixture that can be attached to the machine's print bed (with double-sided tape) for the pad printing process. Once the fixture is complete, it's time to make your cliché or "plate". This is done by ouputing a mirrored, reversed, photo positive image onto special transparency film with an inkjet printer, using pigment dye ink. The film is then placed on an new UV sensitive plate (~5 are included) ink side down, put into the exposure unit, held in place securely by vacuum pressure to the plate and "burned" with UV light, remove and wash the unburned area (blocked by the ink in the film) of the plate out with alcohol - leaving a relief area in the plate that is an exact duplicate of the film (the depth is determined by burn time). To print: pull the print head to the front position and choose and attach a silicone pad (included are 6 different pads in various shapes and sizes). Then make sure the shuttle unit is in the front and bolt the plate to the plate bed with the image in the back postion, fill the inkwell with ink and place on the plate over the image area (thus filling the relief with ink), move the shuttle unit to the back; drop it down around the inkwell and secure, a substrate is placed in the fixture, the machine is engaged shuttling the inkwell to the forward (the magnetic pressure + ceramic ring only leaves behind the ink that has settled in the image relief), the pad simultaneously moves to the back and the ink is then transferred (pad down) from the plate to the pad, (pad up), the pad moves forward over the substrate while at the same time the ink shuttle moves backward (re-depositing ink into the image cavity), the image ink is printed (pad down), (pad up), the substrate is removed, repeat.
Screen Printing: A printing technique that uses a woven mesh and frame or "screen" to support an ink-blocking stencil called Capillary Film or Emulsion (two partial tubes of capillary film are included with this machine). The screen forms open areas of mesh that transfer ink, which is pressed through the mesh as a image, onto a substrate. To do this, a squeegee (6 new squeegees are also included) is moved across the screen stencil, forcing the ink into the mesh openings for transfer by capillary action during the squeegee stroke. This machine can perform two different types of screen printing: Flat and Rotary.
Rotary (printing on any cylindrical substrate with at least one "open" end, ie. cup, mug, or bottle): There are fixtures included with this machine that are used at both ends of the substrate. The fixtures at the open end have two more sub-types of fixtures that are included (for either rigid or non-rigid substrates). Rigid items are held in place at the open end by the auto insertion a self adjusting "Mandrel" (for inside diameters of between 2-4") of hard substrates (glass, ceramic, metal) Non-Rigid substrates are both secured and stiffened for printing with a conical pneumatic inflation tip (there are about 8 tips included ranging from .5-3.5") that is inserted into the open end of soft item (usually plastic sports bottles, shampoo bottles, stadium cups, etc). At the other end of the substrate (usually a closed end), a "bottom fixture" (there are ~6 included with this machine) is used to hold both rigid or non-rigid items (ranging in size from .5-4" in outside diameter). To Print: Capillary film is applied to a clean dry screen and allowed to dry, a photo positive image is output to transparency film (the same as above), secured to the capillary film and burned in the included exposure unit, the image area of the capillary film on the screen is then washed out creating the image stencil and allowed to dry, configure the machine per the included instructions for rotary printing (in this process, the screen and substrate move together and the squeege/flood bar remain stationary), the applicable fixtures for the open and closed ends of the substrate are selected and attached to the machine, put the fixture assembly in the lowest position, move the screen to the front position, engage the machine and cycle to forward to Step 1 position (the open end fixture moves outward and away from the bottom fixture, a substrate is secured over this fixture, cycle to Step 2 (moving the open end fixture inward thus pinning the substrate in place due to the pressure created between the two fixtures, place the screen in place but do not secure, cycle step 3 (lifting the substrate/fixture assembly) and adjust the height position of the assembly so that there is an 1/8" gap between the screen and the print surface of the substrate, adjust the screen position for proper image location related to the substrate, secure the screen, cyle step 4 and adjust squeegee down pressure (putting the screen mesh in contact with the substrate), cycle to step 5 and adjust flood bar height, cycle step 6 and adjust travel length of the screen's back position and rotation degrees of the substrate, cycle step 7 (dropping the assembly and returning the screen to the front position, hold the substrate while cycling step 8 (bringing the open fixture outward and remove substrate, deposit ink into the screen, select the auto function on the control panel, place substrate back over the open fixture, engage machine, repeat.
Flat (printing on any substrate with a flat surface, ie. sign, decal, shirt, frisbee, award ribbon, etc.): The only fixture necessary for this method of screen print is what is know as a platen, for this machine a single platen is all that is needed for any job, and it is included. To Print: Repeat the above steps for screen preparation, configure the machine per the included instructions for flat printing (in this process, the squeege/flood move and the screen and substrate remain stationary), attach the included flat fixture or "platen" to the machine and put in the lowest position, place substrate onto the platen, move the squeegee/flood bar assembly to the front position, engage the machine and cylce step 1 bringing up the platen and substrate; adjust platen height so that there is an 1/8" gap between the screen and the print surface of the substrate, cycle step 2 and adjust the screen position for proper image location related to the substrate, secure the screen, cyle step 4 and adjust squeegee down pressure (putting the screen mesh in contact with the substrate), cycle to step 5 and adjust flood bar height,cycle step 6 and adjust travel length of the squeegee/flood bar assembly, cycle step 7 (dropping the platen and returning the squeegee/flood bar assembly to the front position, deposit ink into the screen, select the auto function on the control panel, place substrate onto platen, engage machine, repeat.
Hope this answers all of you questions. If not, let me know.
Re: Automatic Screen Printing & Pad Combo (COMPRESSOR incl): the
Thanks
Re: Automatic Screen Printing & Pad Combo (COMPRESSOR incl): the
Auction ends in 21 hours!
Re: Automatic Screen Printing & Pad Combo (COMPRESSOR incl): the
I am curious as to how this machine operates and what this particular machine was set up to print, and what jigs, fixtures, supplies etc. might be included?
Re: Automatic Screen Printing & Pad Combo (COMPRESSOR incl): the
Why dont you just read the description of the ad?